Install ABLATE Dependencies
Keeping all dependency build steps updated can be difficult as they change often and are OS/platform specific. To allow the most up-to-date information to be available dependency build steps are maintained in the ABLATE wiki. Please follow the step-by-step guides for your OS/platform on the ABLATE wiki to install the required dependencies before following this page. These directions are for local install where PETSc built mpi and the PETSC_DIR environmental variable was set according to the ABLATE wiki. The latest version of ABLATE has been tested against PETSc 3.22.0 382a0339 .
Downloading and Building with CLion (with installed dependencies)
CLion is a C/C++ IDE that uses cmake files for configuration. These directions outline the steps to running the framework with CLion.
- Download and Install CLion.
- Open CLion and select Get From VCS from the welcome window and either
- (recommended) Select GitHub and Login/Authorize access. Then follow on-screen instructions to clone your fork of ABLATE.
- Select Git from the Version Control dropdown and enter your ABLATE fork url.
- Enable the
local-ablate-debugandlocal-ablate-optbuild profiles.- If not opened by default, open the Settings / Preferences > Build, Execution, Deployment > CMake preference window from the menu bar.
- Select the
local-ablate-debugand click the “Enable profile”. Repeat for thelocal-ablate-optand apply/close the window.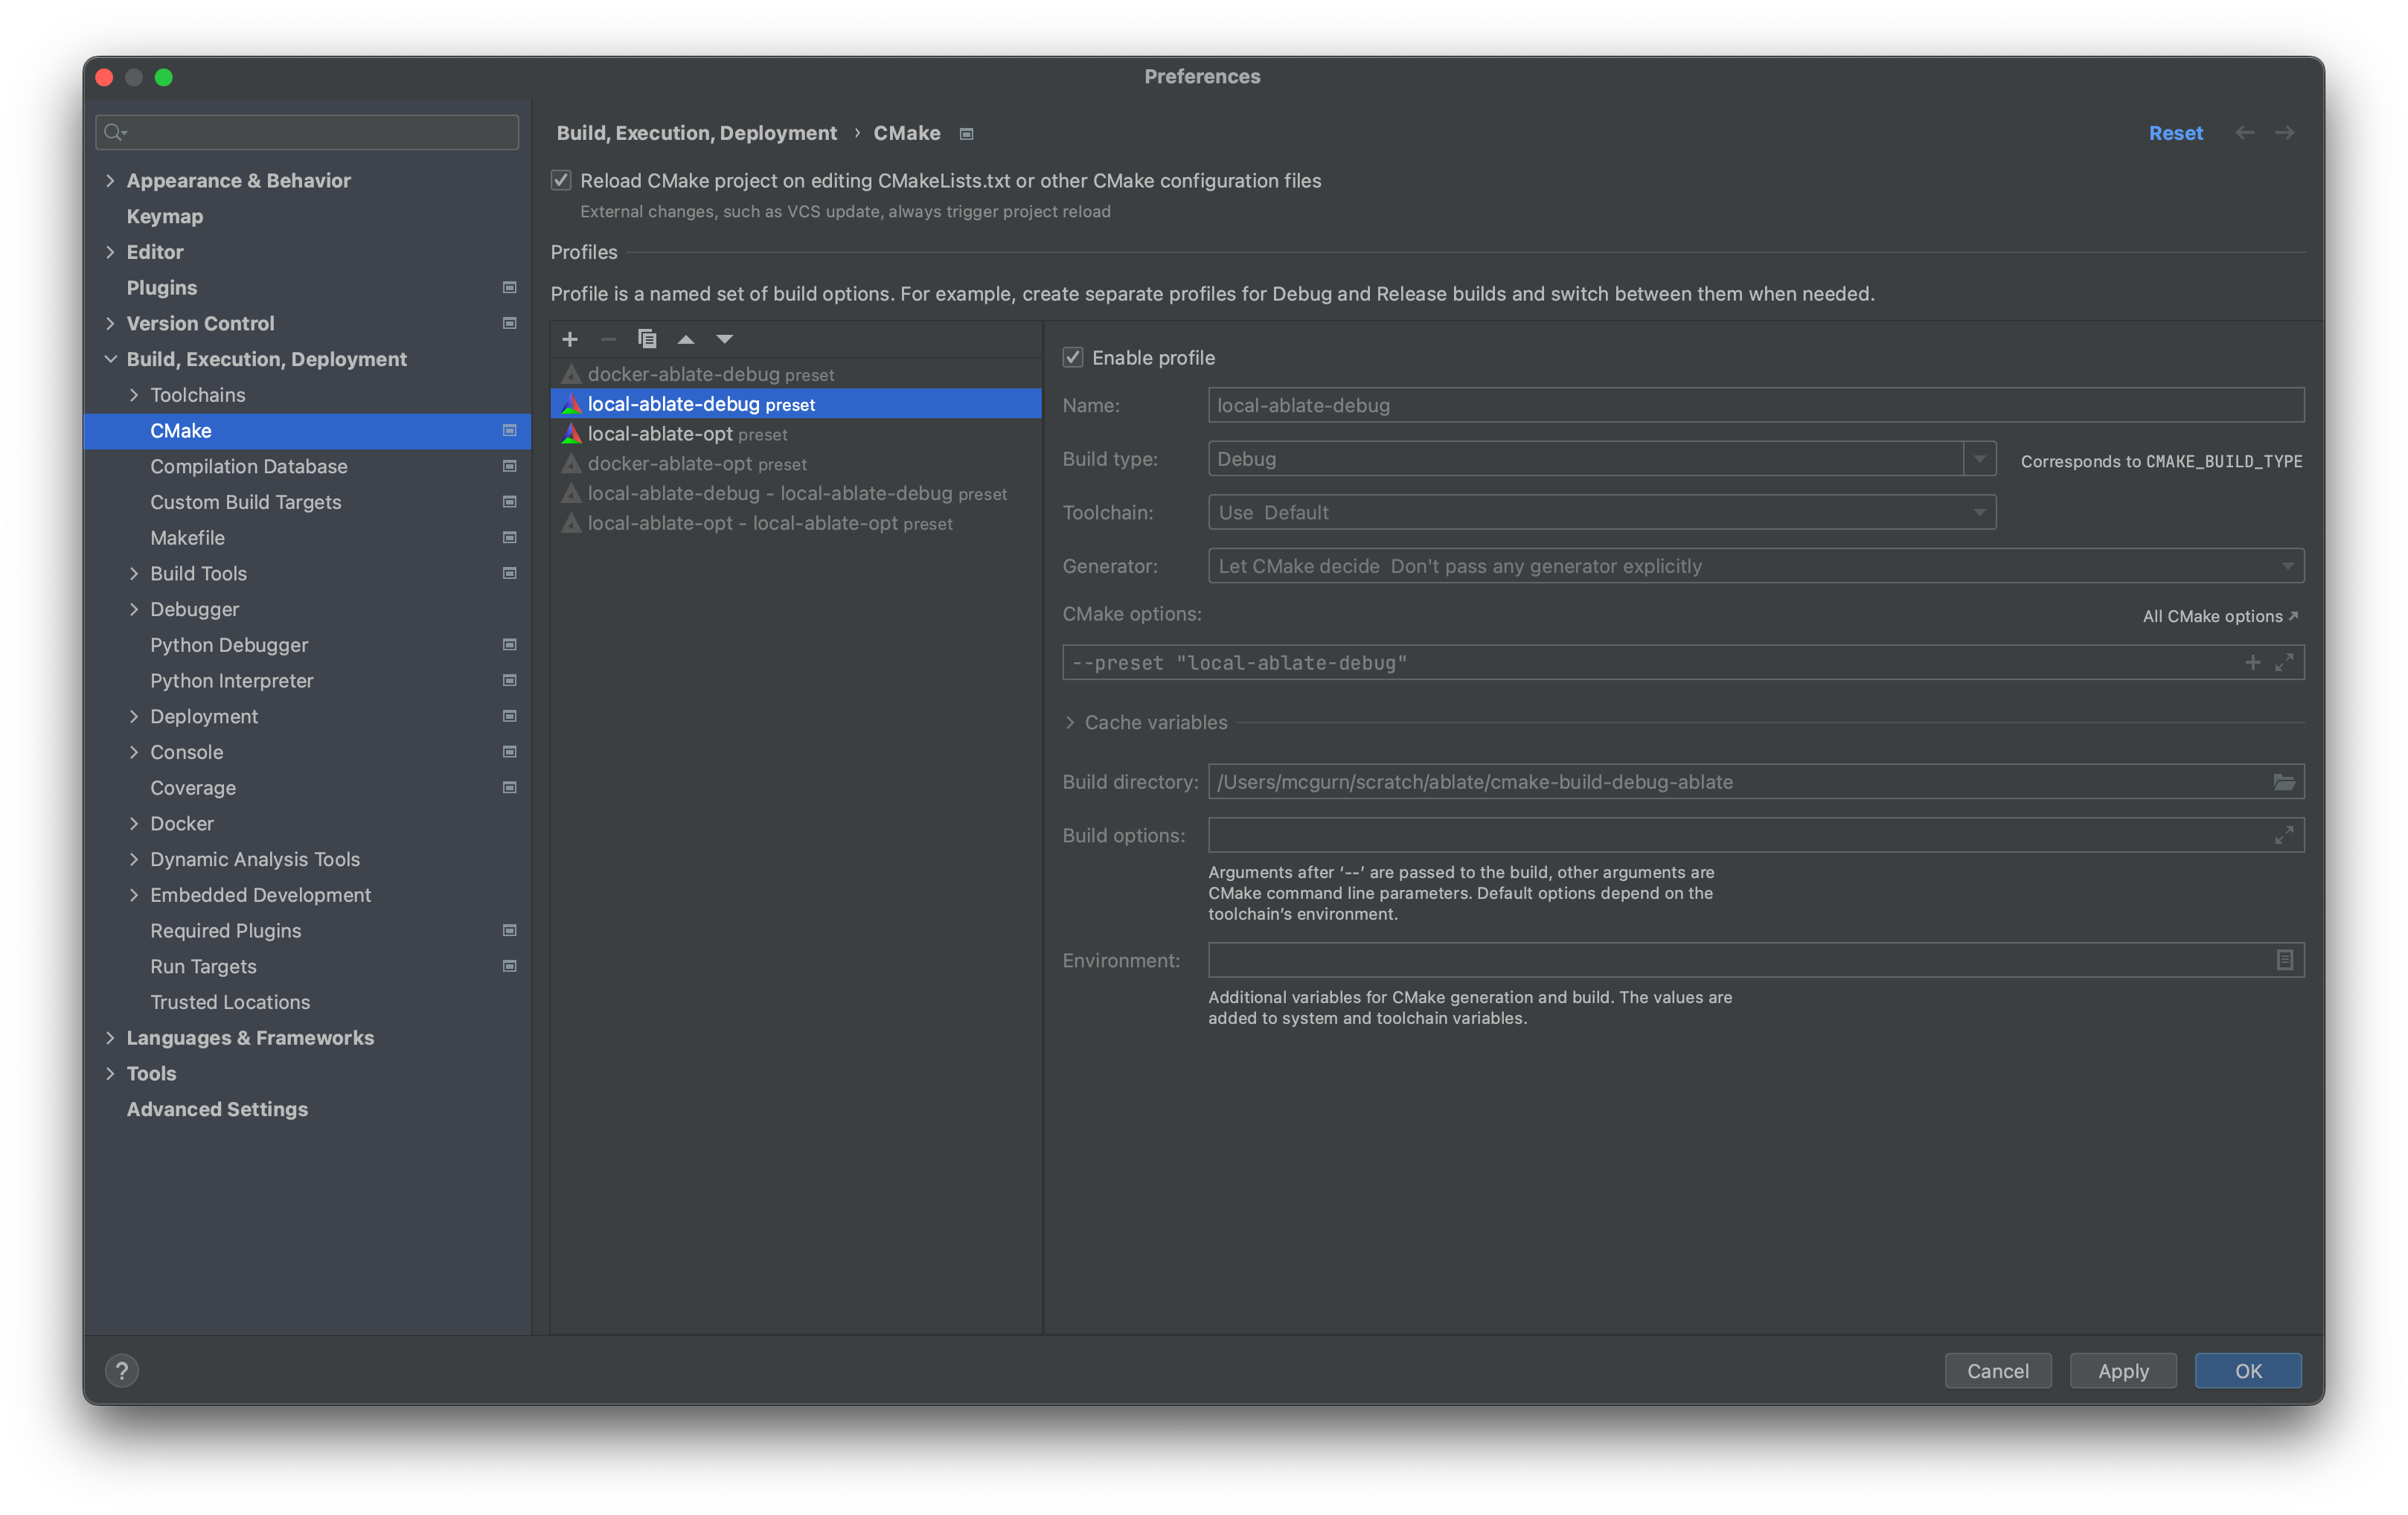
- Select the
local-ablate-optorlocal-ablate-debugbuild profile under the build toolbar. In short, the debug build makes it easier to debug but is slower. The release/optimized build is faster to execute.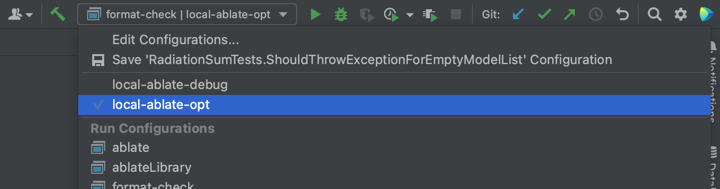
- Disable any other profile
- Build and run all tests using the All CTest configuration.

- If you are new to CLion it is recommended that you read through the CLion Quick Start Guide.
Downloading and Building with the Command Line
- Clone your ABLATE fork onto your local machine. It is recommended that you setup passwordless ssh for accessing GitHub.
git clone git@github.com:USERNAME/ablate.git - Move into the ablate directory
cd ablate - Configure and build ABLATE. Both the debug and optimized versions are built. If you are developing new capabilities you may want to specify debug. If you are running large simulations specify opt.
# debug mode cmake --preset=local-ablate-debug cmake --build --preset=local-ablate-debug-build -j # optimized cmake --preset=local-ablate-opt cmake --build --preset=local-ablate-opt-build -j - Run all the ABLATE tests
# debug mode ctest --preset=local-ablate-debug # optimized ctest --preset=local-ablate-opt - Run ablate with an input file
 # debug mode
 $PETSC_DIR/arch-ablate-debug/bin/mpirun -n 2 cmake-build-debug-ablate/ablate --input /path/to/input/file

 # optimized
 $PETSC_DIR/arch-ablate-opt/bin/mpirun -n 2 cmake-build-opt-ablate/ablate --input /path/to/input/file